Suppose you’re trying to implement some form of single sign-on (SSO) for your website. You see those cool “sign in with Google” or “sign in with Facebook” buttons on other websites and you decide this is the experience you want to provide visitors of your own website but you’re not really sure how to do it. You read some friendly web articles on OIDC but feel like you’re not getting the big picture. This was me when I first started learning about OAuth. I hope this post will give you the missing pieces I wish I’d had.
Recapping OpenID Connect and OAuth 2.0
Third party sign in is usually done following the OpenID Connect specification, which is an add on to the OAuth 2.0 specification. OAuth 2.0 and OpenID Connect are massive topics I don’t intend to cover here in the level of detail they deserve. If you’d like more information on these topics I would highly recommend checking out this link. It’s probably one of the best explanations I’ve seen on the web.
In a nutshell a typical OIDC flow looks like this:
- A visitor to your website clicks a “sign in with <someIdentityProvider>” button.
- The browser is directed to the identity provider’s authorization page where the user enters their credentials, maybe does some multifactor authentication and maybe answers a few consent questions.
- The identity provider directs the browser back to your website with a code your website can exchange for an access_token and an id_token at the identity provider.
- You validate the id_token and use the information it carries to grant the user access to your own website.
Long story short, at the end of the flow your website is left holding an ID token for a user in the identity provider’s system. Most of the documentation out there will give you some variation of the wording in step 4 above, without actually saying what you can or should do with the ID token. I’m going to pick up where that story leaves off by showing you how you can use this ID token to complete the third party sign in for your own website.
ID token
First, it’s important to understand the ID token itself. The ID token is a JSON Web Token (JWT) whose payload contains information about the user’s identity in the identity provider’s system. For example, if the identity provider is Google, the ID token you get from Google contains information about the user in Google’s system. It’s digitally signed by the identity provider and you can easily verify the signature. Verifying the signature lets you know that the information contained in the ID token truly came from your identity provider, so you can trust it.
A typical ID token looks like this. It’s 3 base-64 encoded strings concatenated with a period.
eyJhbGciOiJIUzI1NiIsInR5cCI6IkpXVCJ9.eyJzdWIiOiIxMjM0NTY3ODkwIiwiaXNzIjoic29tZS1pZGVudGl0eS1wcm92aWRlci5jb20iLCJuYW1lIjoiSm9obiBEb2UiLCJlbWFpbCI6ImpvaG4uZG9lQHNvbWV0aGluZy5jb20iLCJpYXQiOjE1MTYyMzkwMjIsImF1ZCI6InlvdXJXZWJzaXRlIn0.8AIFN3XgDUk7DWCP8lvNOp7w57n7G_6Weo6ZG3yfebQ
The first section is a header containing information about how the token was signed. The third section contains the digital signature. The second section is most interesting because it contains the actual payload. After base-64 decoding the payload section of the ID token above we get this:
{
  "sub": "1234567890",
  "iss": "some-identity-provider.com",
  "name": "John Doe",
  "email": "john.doe@something.com",
  "iat": 1516239022,
  "aud": "yourWebsite"
}
The payload contains a lot of values like iss (issuer), aud (audience) that are useful for validation which I’ll talk about at the end of this post. The most relevant piece of information is the sub (subject). This is a unique identifier for the user in the identity provider’s system. Some providers will use an email address, others may use a simple integer. Whatever it is, it’s unique within the identity provider’s system and does not change over time. The payload also typically contains information about the user such as their name and email address.
Getting the ID token
Let’s take a closer look at step 3 of the abbreviated OAuth 2.0 flow described in the recap above. The identity provider directs the browser to a URL in your website’s domain passing it an authorization code in the query string of the GET request. This authorization code can be exchanged for an ID token and an access token. We’ll disregard the access token since we don’t intend to access the user’s resources in the identity provider’s system (ex. we don’t plan to access their Google contacts). We’re focused here on implementing third party login only so we need only the ID token. This exchange is fairly straight forward when your website is implemented the traditional way. If your website is a single page application (SPA) then things can get a little more complex.
OIDC with traditional website
If your website is a traditional website then the URL to which the identity provider hands the authorization code to should be a URL that’s routed to a controller endpoint in your website’s backend. This URL is defined by you when you setup third party login with your identity provider. Once your controller receives the request it can exchange the code it reads out of the request for an ID token and complete your website’s login process, whatever that may be (see “Processing the ID token”). Note that the request to exchange the authorization code for ID token traditionally requires that your backend system provide additional credentials called the “clientId” and “secret” which should be kept hidden from prying eyes. During the exchange your website’s backend system calls the identity provider’s token endpoint directly. This is what some call the “back channel” because the request to exchange the authorization code for the ID token does not involve the browser and thus the client credentials are kept safely hidden from the frontend. The backend should process the ID token it receives (see “Processing the ID token”) and redirect the browser to the appropriate view, often sending an authentication cookie back to the browser with the redirect response (most traditional websites use cookie based authentication).
OIDC with SPA
When your website is a single page application (SPA) it’s often simpler to handle authentication the same way a traditional website would (see “Making SPA authentication simpler”). However, you may decide to have your identity provider send the authorization code to a URL handled by the SPA itself if the SPA initiates the third party login. This presents challenges for a couple reasons:
- It’s not safe for a SPA to hold the client credentials (ie. clientId, client secret) it needs to exchange the authorization code for an ID token because they’re easily discovered by anyone inspecting the SPA’s HTML and Javascript.
- Your SPA probably can’t do authentication on its own anyway. It will likely rely on a backend system to manage and persist data – actions that typically require authentication and authorization with the backend. Put differently, the frontend needs to somehow authenticate with the backend even if it’s the frontend that’s driving the OIDC flow with a third party identity provider.
Luckily the first challenge can be solved by using the Proof key for code exchange (PKCE) extension of OAuth’s authorization code flow. In essence it uses value hashing to validate that the caller asking to exchange the authorization code for tokens is the same as the one that initiated the authorization code flow, no client secret required.
For the second challenge let’s suppose that our frontend SPA gets an ID token from the identity provider. The SPA is now holding the ID token but the SPA’s backend system has no knowledge of the OIDC flow the frontend just completed. For example, let’s assume the backend is secured with OAuth. The frontend gets an access token from its own backend and then includes that token in all of its requests (in the Authorization header). One strategy could be to exchange the ID token for an access token directly via the JWT-bearer flow. The JWT-bearer flow is very simple. You call the /connect/token endpoint as usual but the payload contains the ID token instead of an authorization code. The backend should process the token (see “Processing the ID token”) and respond with an access token the front end can use to call its backend API. Below is a sample request body containing the ID token from above. Remember that ID tokens are JWTs which means we can use the ID token with the JWT-bearer flow directly. Notice the grant type of urn:ietf:params:oauth:grant-type:jwt-bearer.
POST /connect/token HTTP/1.1
Host: yourwebsite.com
Content-Type: application/x-www-form-urlencoded
grant_type=urn%3Aietf%3Aparams%3Aoauth%3Agrant-type%3Ajwt-bearer&assertion=eyJhbGciOiJIUzI1NiIsInR5cCI6IkpXVCJ9.eyJzdWIiOiIxMjM0NTY3ODkwIiwiaXNzIjoic29tZS1pZGVudGl0eS1wcm92aWRlci5jb20iLCJuYW1lIjoiSm9obiBEb2UiLCJlbWFpbCI6ImpvaG4uZG9lQHNvbWV0aGluZy5jb20iLCJpYXQiOjE1MTYyMzkwMjIsImF1ZCI6InlvdXJXZWJzaXRlIn0.8AIFN3XgDUk7DWCP8lvNOp7w57n7G_6Weo6ZG3yfebQ
Making SPA authentication simpler
Much of this complexity can be avoided by ignoring the urge to build authentication into the SPA. Really we’re making two major changes to the SPA-driven OIDC scenario described above:
- Don’t handle authentication on the frontend. Your backend will initiate and drive the OIDC flow.
- Have your SPA use cookie-based authorization with your own backend instead of token based authorization.
Imagine that your website has a “sign in” page that’s hosted traditionally. On this page the user may choose to enter credentials into username and password boxes or click a button to begin login with a third party provider (ex. “sign in with Google”). If the user clicks on the button to sign in with a third party provider the browser constructs a request to your backend system which initiates the OIDC flow by redirecting to the browser to the identity provider’s authentication page where the user enters their credentials. Via browser redirect the identity provider then passes an authorization code via a URL that gets handled by a controller on your backend (not the SPA). Your backend then exchanges the authorization code it reads out of the URL for an ID token via the back channel as usual. Your backend completes ID token processing (see “Processing the ID token”) and redirects the browser back to your SPA, setting an authentication cookie in the process. All of the SPA’s requests to the backend include the authentication cookie (assuming the backend’s API is HTTP-based which is overwhelmingly common).
Processing the ID token
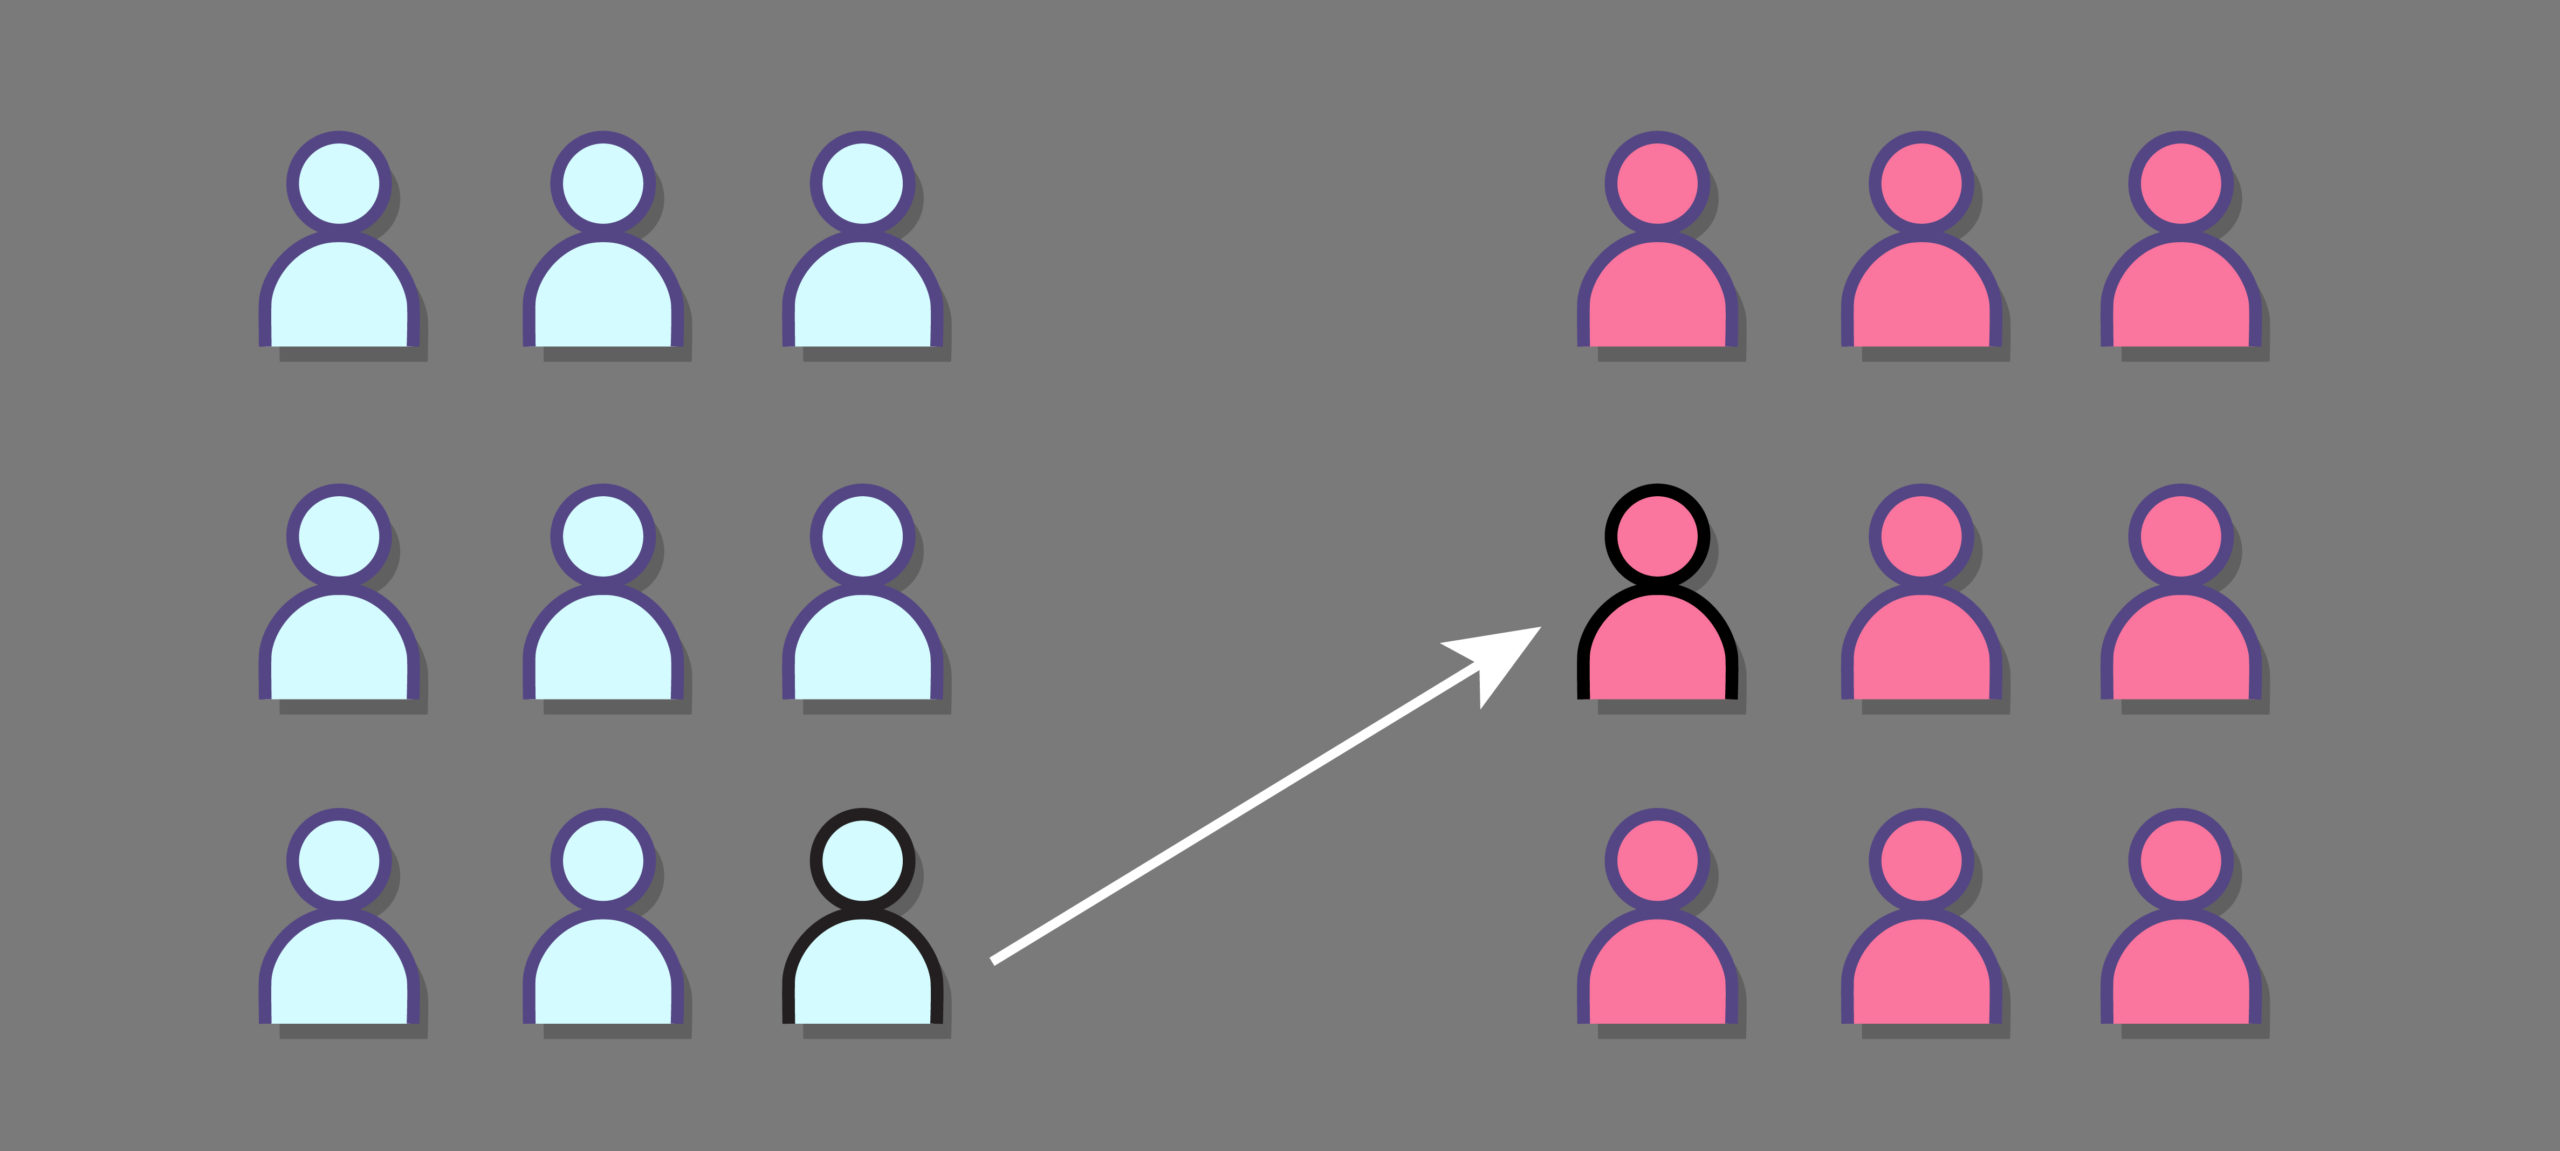
When your backend system receives an ID token it will need to issue either its own access token (ex. during a JWT-bearer flow) or authentication cookie to represent some unique identity that your system can use to distinguish one user from another. You could “adopt” the external identity by pretending its your own but this will work only if your system is designed to support only one third party identity provider because the subject of the ID token is unique only within the identity provider’s system (not across systems). You may try to get away with some kind of concatenation of the issuer and the subject but there’s a cleaner solution: mapping. The idea is to maintain a mapping table that maps the combination of issuer + subject to a subject (ie. identity) that’s internal to your website.
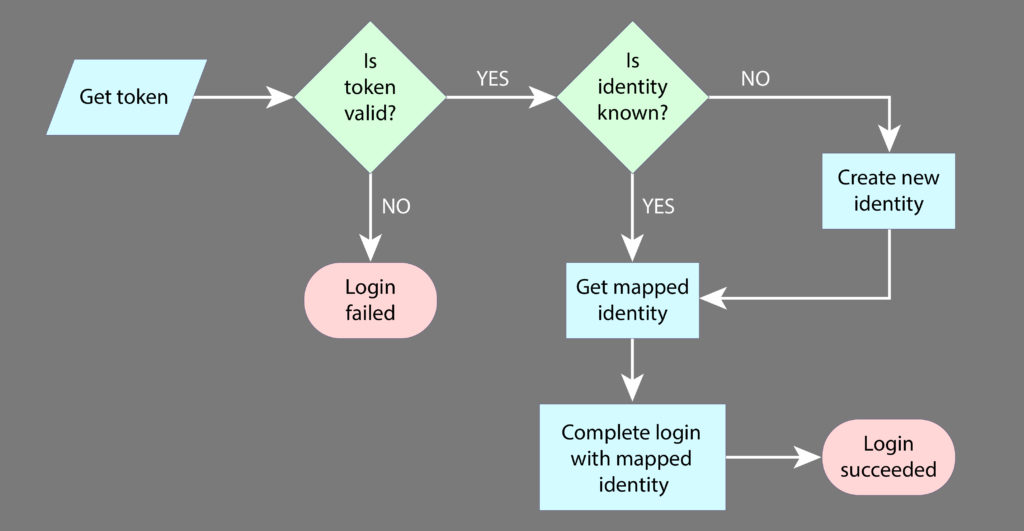
First thing’s first. You’ll want to validate the ID token. The JWT-bearer flow spec does a good job of explaining what JWT elements need to be validated but in short we want to check that it’s not expired, that it’s been issued by a trusted source and that it was made for your system. In .NET there are libraries that simplify the validation process for you.
Next, we want to check if this identity is a returning identity or a brand new one. This can be done by querying the mapping table. If an entry is found, that means we’re seeing a returning visitor! Simply return an access token or authentication cookie, as appropriate for your website, for the internal mapped identity. If an entry is not found it means the user is brand new and we need to create an internal identity and add an entry to the mapping table. How you choose to do this will depend on the specifics of your system but I’ll give you some ideas below. All of this can typically be done before returning from the authentication request.
- Suppose you have a database of internal identities (ex. imagine a “users” table – this may even be an existing table in a legacy system). You could try to create a record using the information you find in the ID token and add that record to the database.
- If you don’t get all the user information you need (or want) from the ID token you can try to create a sort of partial user. When the user access your website (having cleared authentication with your own backend) you can check to see if they’ve completed the setup process (ie. see if the user is partial) and if they haven’t completed the setup process prompt them to enter the information you need (or want) before allowing them to access the rest of your site.